
-

0M Total Time
-

0M Prep Time
-

11 Ingredients
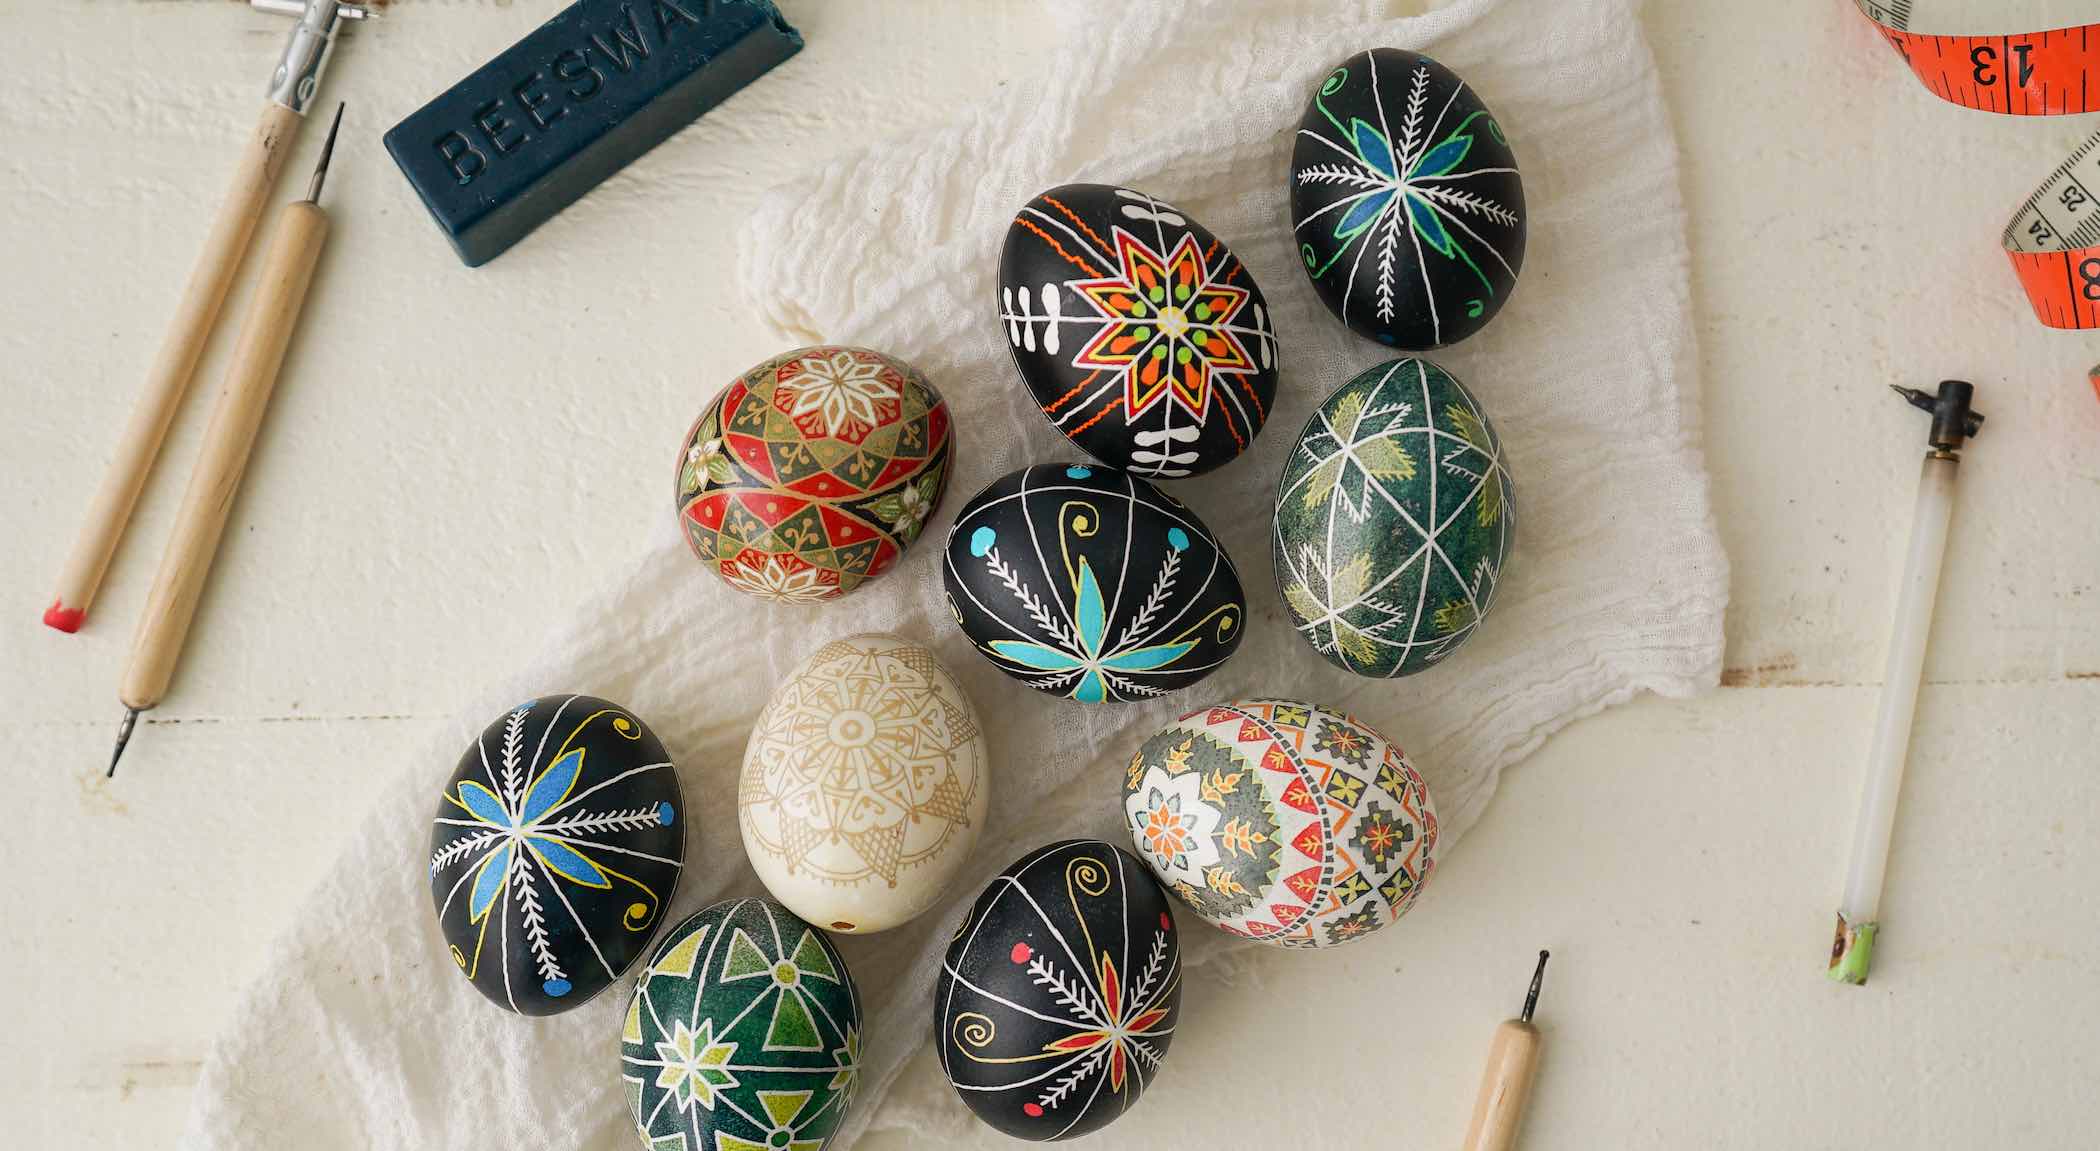
A simplified version of decorating these Ukrainian Easter eggs!
Ingredients & Directions
- WHAT YOU NEED
Directions
Lightly RUB eggs with vinegar to prep the surface. DRY DRAW pysanky designs on the eggs, very lightly, with a pencil. SET aside.
COMBINE 1 cup boiling water, 1 tsp. of distilled white vinegar and about 20 drops of food coloring of your choice per dye cup. ADD one spoon into each dye cup and LINE UP the cups on your table. ORGANIZE your dye colors, from light to dark.
PUT the kistka head over a candle to heat it up. SCOOP up a little beeswax using the kistka. REHEAT it over the flame until the wax is melted. SEAL the holes that were created when the egg was emptied.
Using the kistka, COVER the lines on the egg that you would like to remain white with the melted wax.
DIP the egg in the lightest color dye until it’s saturated and LET If you want to add another color, use the kistka wax to COVER the areas as needed. DIP the egg in a different, darker color dye. To add more colors, REPEAT as needed. LET the egg dry.
REMOVE the wax by placing the egg above a candle. WIPE the melted wax off with a napkin. This is how you remove the wax covering the egg shell itself and lower-level colors.
Ingredients
- 12 empty EGGSHELLS
- Vinegar
- Pencil
- Boiling water for each dye cup
- Acid dye or food coloring (acid dye will produce brighter colors)
- Small bowls or plastic containers for dye cups
- Spoons
- Kistka (a stylus with a small funnel tip, used to hold and draw melted wax onto eggs)
- Candle
- Melted beeswax
- Matches
Tips
Use vinegar on a napkin to erase the pencil, if needed. The pencil’s eraser can destroy the egg’s surface.
Search “pysanky egg designs” online and many options will appear. Start with simple beginner designs and work your way up to advanced.
- To Empty the Egg Shells
Directions
Wash the egg, using water warmer than the egg, and dry it. With a sterilized long needle or bead reamer, prick a small hole in the small end of the egg and a large hole in the large end. Carefully and evenly make the large hole bigger using the needle or bead reamer until it’s big enough to accommodate the tip of a baster. Stick the needle or skewer into the yolk to break it. Remember to use sterilized tools if you plan to save the egg for consumption.
Either shake the egg large-end down over a cup or bowl until the contents come out or use a small baster or nasal aspirator to push out the contents. Press the bulb of the baster or nasal aspirator to push air into the egg, letting the contents fall into the cup. If the contents don’t come out easily, insert the needle again and move it around to be sure both the shell membranes and yolk are broken. Rinse the empty shell under cool running water and stand it on end to drain and dry. Be careful when decorating emptied shells – they’re quite fragile.
Use egg contents immediately in a recipe that includes mixed yolks and whites and calls for thorough cooking. Most baked dishes – such as casseroles, custards, quiches, cakes or breads – are good uses for eggs emptied from their shells.
To ensure food safety, eggs should be cooked until both the yolk and the white are firm. Consuming raw or undercooked eggs may increase your risk of foodborne illness, especially for those with certain medical conditions. For recipes that call for eggs that are raw or undercooked when the dish is served, use either pasteurized shell eggs that have been treated to destroy Salmonella, or use pasteurized egg products.